Five Ways to Speed Up Your Offensive Installs This Fall
Aug 6, 2020
7 min Read
By Mike Kuchar
Senior Research Manager/Co-Founder, X&O Labs@MikekKuchar
Ready to hit the ground running? We’ve got some tips for getting the most out of your limited prep time this season.
There’s been several significant challenges for coaches during this pandemic, none bigger than the in-person time lost physically developing players.
For the last four months, we’ve been left to our own imagination in planning for how and when we can provide some guidance in working with players. With that in mind, here are a few methods to establishing a framework for expedited fall camp planning.
Depending on the state of your program or state legislation, there are two main factors that will play a role in your installation processes this camp.
Factor 1: Time
Coaches need to be efficient in how they are going to delegate their time this preseason. I can only speak for my state, but New Jersey has already been stretched thin on time. In Phase 1, we’re allowed to practice with 10 players, with participation increasing in subsequent phases. We are given seven days of practice with one day off.
With the assumption that their strength and conditioning may have significantly been affected the last four months, the last thing we want to do is burn our kids out physically before we get into the meat of the season.
(Looking for more ways to cut down on your film review? Hudl Assist saves you hours each week during the season with its film breakdowns)
Factor 2: Experience at Quarterback
A returning quarterback is an immeasurable asset to any program during this time. No amount of virtual Zoom meetings can prepare a signal-caller for real game experience. We’re seeing the same sentiments come out of the NFL, where organizations are scurrying to acquire and solidify experienced players behind center (the New England Patriots’ recent signing of Cam Newton the most popular example).
For high school programs, a decision needs to be made on how much responsibility the quarterback will have for the upcoming season. With most 7-on-7s and passing tournaments canceled, it may make sense to cut back or compartmentalize his reads (if you’re not doing that already). In our circumstance, we’ve gone away from full-field reads to help significantly clear the picture for our quarterbacks.
Method 1: Group Concepts Together
We’ve limited our offensive playbook into bucket teaching. In the pass game, we’ve grouped our routes into the following:
Horizontal stretches
Vertical stretches
Play action passes
Screens
That may not seem much different than usual. But this season, we’ve simply eliminated anything that didn’t fit into those buckets.
We’ve also made the choice to group all of our run game into three main concepts:
Tight zones
Wide zones
Gap runs
That will be the extent of our run game this season. We consciously decided as a staff to eliminate more and more from our play menu as our timeline continually diminished.
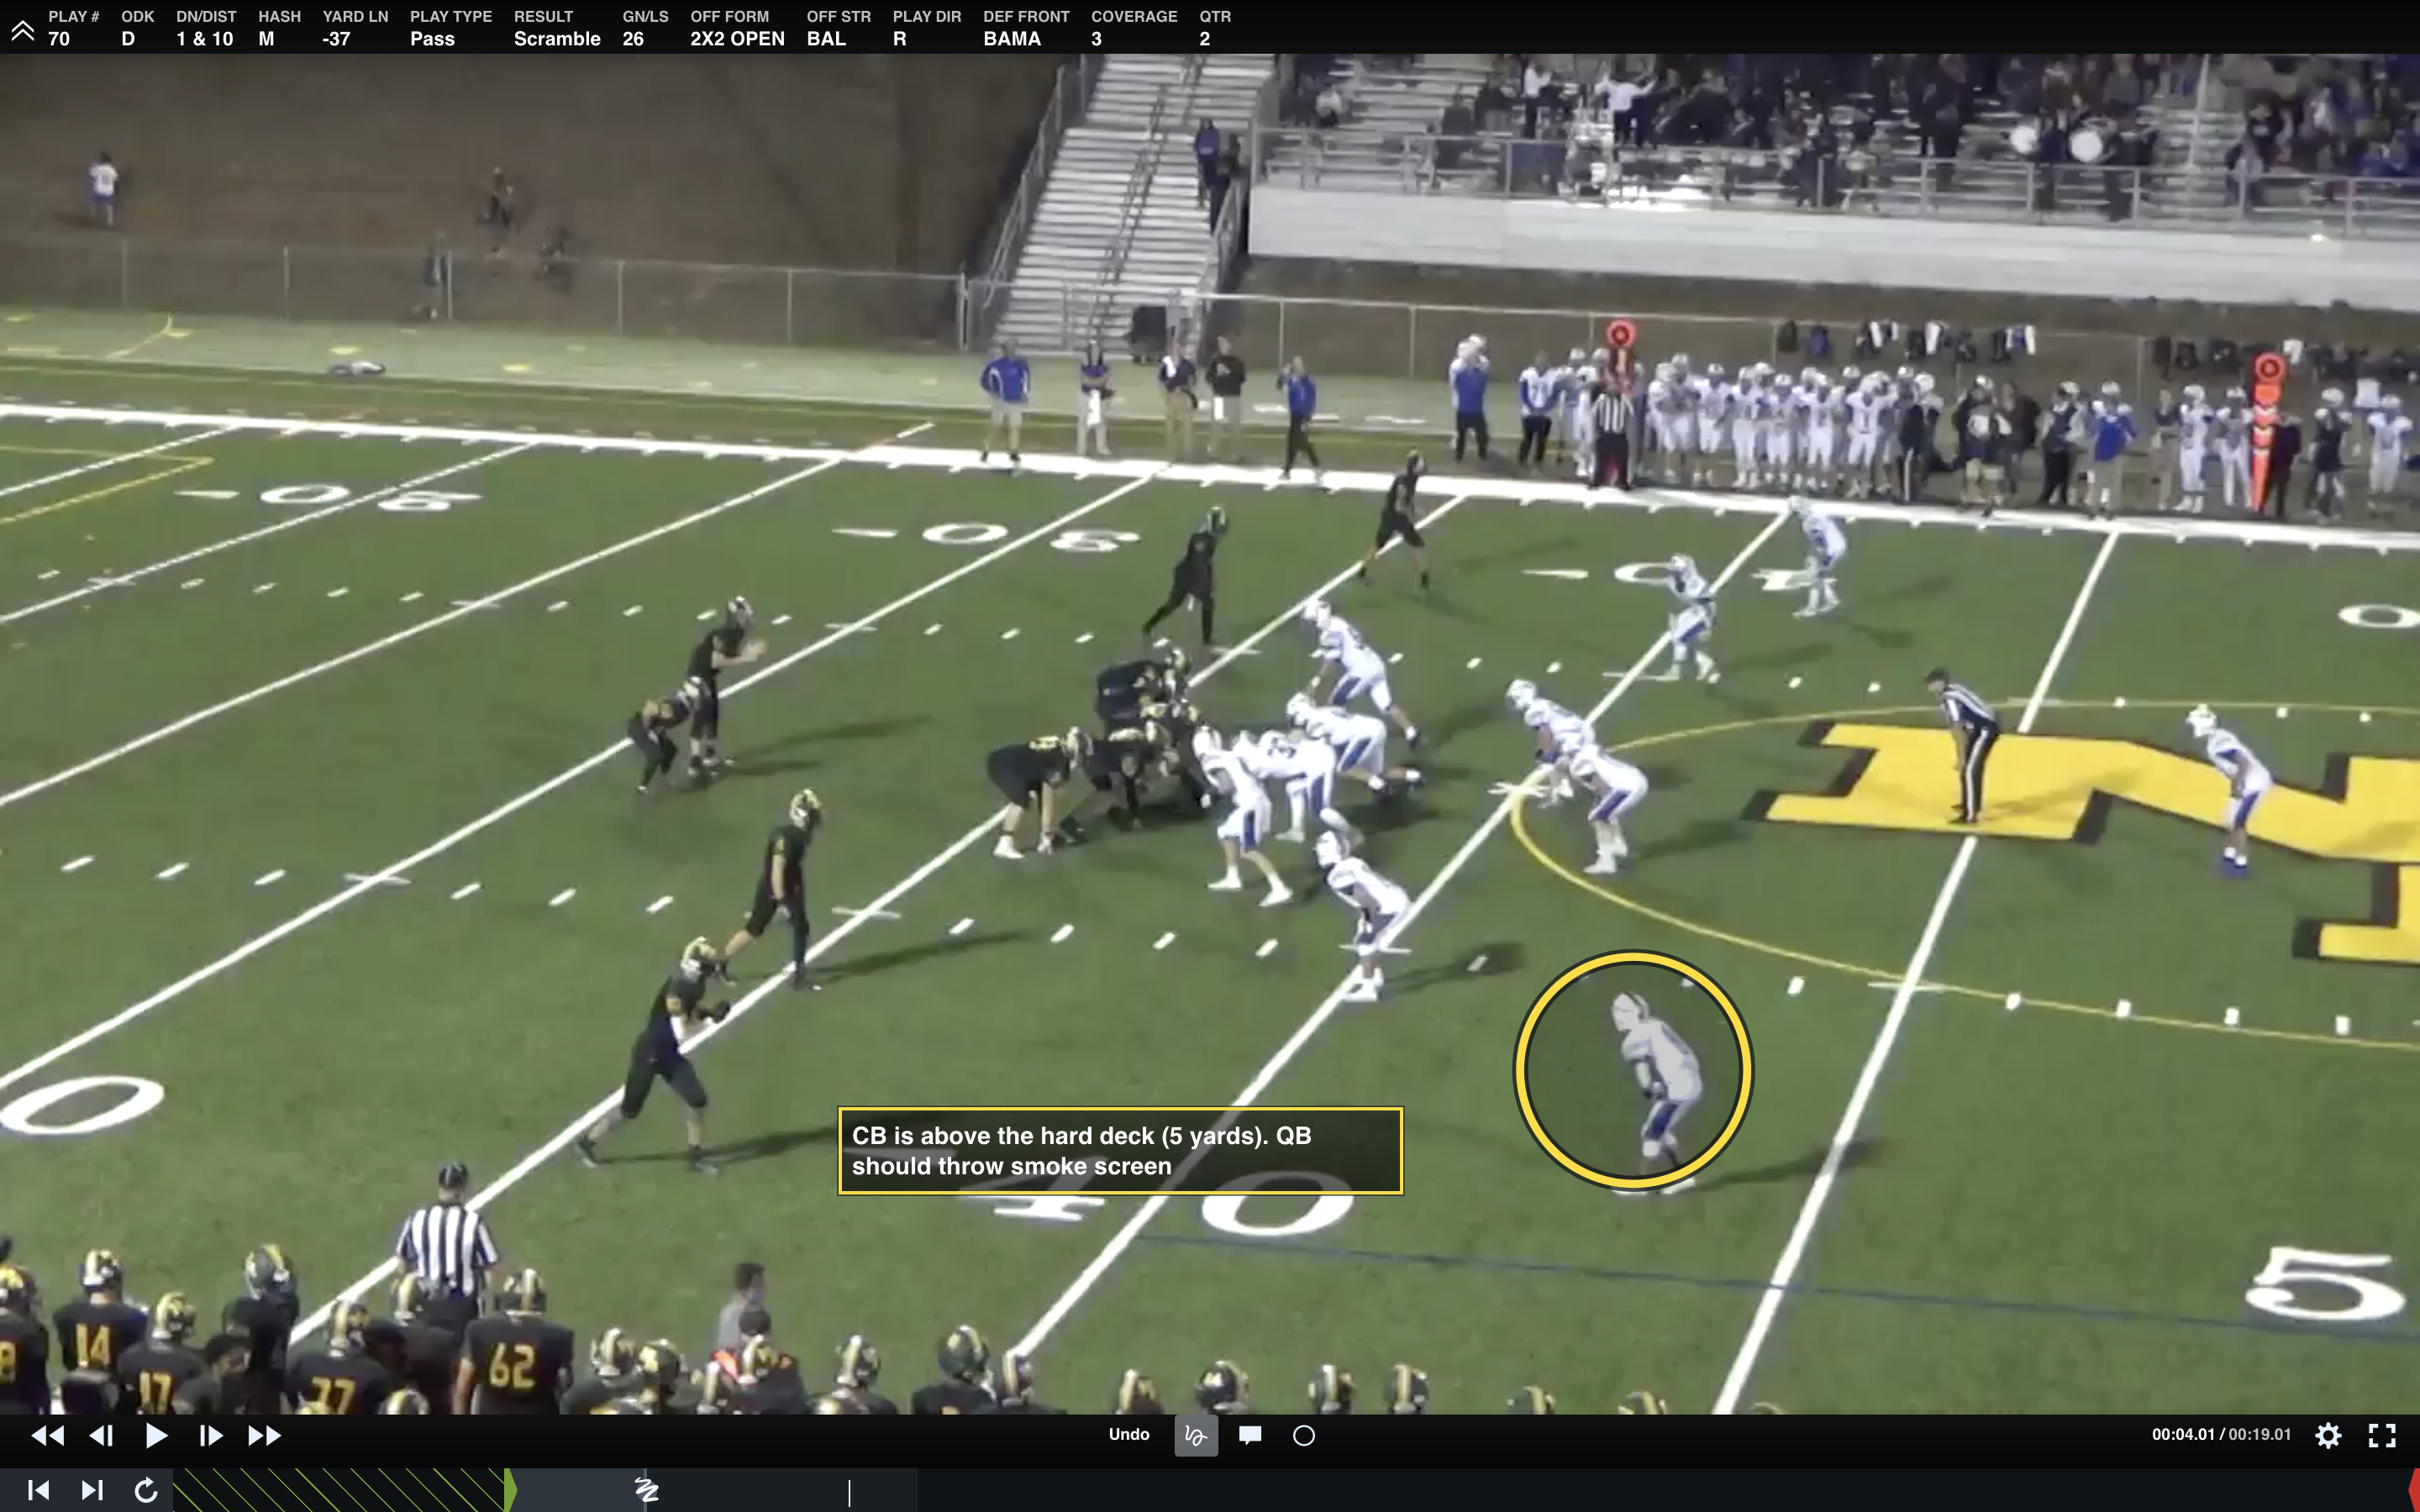
In the RPO game, we’ve decided to clearly segment pre-snap and post-snap reads by play call. We’ve been able to do a lot of work with our quarterback in teaching him exactly what leverage is. We packaged our quick and bubble screens off defender leverage and were able to use Hudl clips and still frames to quiz him on each.
This example below promotes an opportunity for a quick “smoke” screen to the No. 1 receiver based on the cornerback’s positioning.
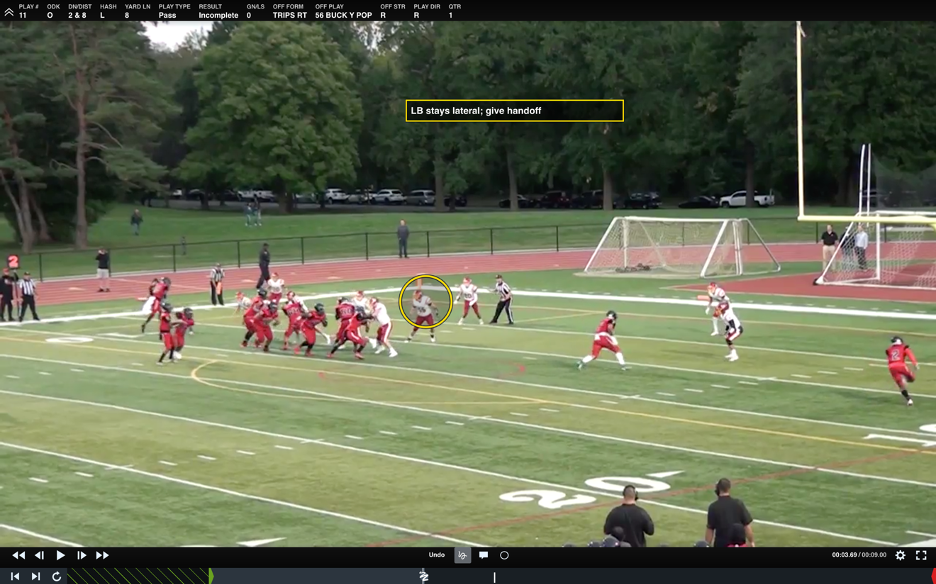
For our post-snap RPO menu, we focused specifically on influencing the play-side box linebacker by packaging our entire run game to manipulate his movement. Again, we were able to use Hudl to talk through clips like the one below in educating our quarterback on the correct decision.
Method 2: Mix Practice Groupings to Promote Leadership
Aside from losing time on strength and conditioning this spring, we also lost our leadership development program, where upperclassmen govern younger players through our competition groups. It’s our best method for assessing and evaluating leadership. Without that, we’ll need to be creative in leadership development.
When summer workouts begin, the limit to each grouping in Phase 1 will be 10 players for social distancing purposes. We decided we’ll mix those groupings by class, rather than by playing experience, for two main reasons:
It gives the older players an opportunity to work with novice players on skill development and provides them with an opportunity to lead drills.
A mixed grouping can also help alleviate a nightmare scenario of an infected key player spreading the virus to the entire position grouping. It’s a scary thought, but one we have to prepare for.
Method 3: Flip Your Teaching Methods
To keep connected with our units during the early summer months, we shared all of our installation PowerPoints, film, etc. with our players through Hudl before meeting with them physically. This was a first for us, but it allowed us to deliver the content ahead of time and monitor their engagement.
Once a week, we circled back on a Zoom call to answer any questions. This cut down the learning curve so that when workouts resume, we can simply focus on particular skills that address these problem areas.
For example, if we found a player had trouble understanding the post-player responsibility in zone double teams, we can plan to spend time during workouts simply working on our near leg, or “gallop,” technique. We want to make sure we assess as many individual deficiencies as we can online, so that when workouts resume, we only need to hit those areas in question.
Method 4: Emphasize Reactionary Drill Work
Quite simply, there isn’t enough time to work on items like bird dogs, shield work or chutes like we’ve done as an offensive line in the past. But we can find a way to implement those elementary skills using the progression below.
I’ve incorporated what I believe are the essential techniques of our run game: gap, tight zone and wide zone runs. The more reps I can get on these, the better. These techniques are all fused into a rotating three-day installation method. On each of those rotating days, we can select one specific drill to work on, attaining maximum potential reps.
Day 1, Gap Run Schemes: Horizontal double teams, training the wall puller to identify second level and kick puller blocks at the line of scrimmage vs. perpendicular and parallel defenders
Day 2, Tight Zone Run Schemes: Vertical double teams, double under vs. single under blocking scenarios for covered defenders, near knee technique for uncovered defenders.
Day 3, Wide Zone Run Schemes: Rip to reach principles of covered defender, square drag technique of uncovered defender and backside cut progressions
Method 5: Integrate Conditioning into Individual Drills
Since we lost our entire spring training block, there’s going to be a significant adjustment period for players to get into the shape they need to be in for fall camp. And quite honestly, I don’t anticipate the majority of our players being in competition shape.
Trouble is, there may not be enough time to separate conditioning from skill development, so it becomes our responsibility to integrate the two. From an offensive line standpoint, I’ve integrated conditioning into our drill work, where groupings get the reps they need at a higher tempo.
An example of this is my double pull drill that we use for our Buck Sweep concept below. Guards rotate from left to right in working the alley player block and the insert block on our Buck Sweep concept. It’s a 10-minute individual period, where players can get up to 20 reps at each position.
This fall camp (if we’re able to have one) will be unlike any other we have experienced as coaches. If we continue to be proactive, and not reactive, in our coaching methods, we have a better chance of giving our players the opportunities they need to succeed.
With the suspension of all athletic activities since last March, the playing field has been leveled. How we use the time we have when workouts resume may make the difference between wins and losses.
***
Good news: Your scouting is speeding up this season. With Hudl's analysis beta, you have a slick new tool to use that puts the data right there on your screen with your film, and lets you uncover deeper tendencies in just a few clicks. Pair it with Hudl Assist, and you'll be spending far less time building and more time analyzing.
Learn more about how the beta works, and how you can get started, with this quick guide.